Thursday, September 9, 2010

Designing a 'Big Girl' Room

As we prepare to transition our little girl from a crib to a twin bed, I am inspired to give my daughter's bedroom a bit of an update. The design that I originally used for her room was relatively simple and gender neutral (since we didn't find out if 'the baby' was a boy or a girl). But, now that she is 2 and has a definite personality and style of her own, I think it's time to give her room some character. Here are some of my ideas:


1. Yellow and White Zig Zag fabric from Hodi and Poppi Fabrics
2. Amy Butler Floating Buds fabric from Seth Grayson
3. Take Shelter print from Ashley G and Drew
4. Love Candy print in lemon from Made By Girl
5. Pretty Bird plush from Pretty Little Things
6. Tall Wood Bed Frame in white from West Elm
7. DwellStudio for Target rug (we already own this rug and it is no longer listed on Target's website)

I will post updates once the room is in progress / completed. What do you think so far?

Wednesday, September 8, 2010

Back From Vacation


A bad case of the flu, 3 weeks out of the country (on vacation) and potty training have kept me away from this blog for a little while. But, now that we are back home and settled, I am feeling ready to start posting again. Plus, I received a little extra incentive this morning via an email from Apartment Therapy. Luca's birthday party is featured today on Ohdeedoh. If you are unfamiliar with Apartment Therapy and their children's site, Ohdeedoh, you Must Check Them Out Now. I always find inspiration and great ideas on both of these sites, so I am very honored to be featured.
Lots more posts coming soon :)

Friday, August 6, 2010

A Very Simple Felt Board


A little while back, I made this little felt board for my daughter. It was really easy to make, and Luca has a great time playing with it. Plus, it is one of those toys that you can constantly modify by adding new felt pieces.

I started by buying a basic white frame. Any size will do, but this one was 21 x 17". I removed the glass and mat from the frame (I used the mat for this project). Then I cut a piece of cardboard (I used the cardboard that the frame was packaged in) to fit the frame. I cut a piece of blue felt slightly larger than the cardboard.


I attached the felt to the cardboard by gluing the overhanging pieces of felt onto the back of the cardboard (it helps to cut triangles out of the corners so that you don't get bunching from excess felt). When the glue was dry I put the felt-covered cardboard in the frame, and voila!


So far I have just cut a few basic shapes out of colored felt, along with some pennant letters, but you could really have so much fun with this. I am thinking of buying one of these sets off of etsy if I don't get around to making my own.

Wednesday, August 4, 2010

Now this is my kind of sewing machine...


I'm not sure that my daughter would know what to do with this, since my sewing machine hasn't seen the light of day in quite some time. But, it's so cute that she might have to fight me for it.
This pretend plush sewing machine is from the etsy shop Nifty Kid Stuff. They also have some adorable plush bunnies and pretend cake decorating sets.

The owner, Caitlin also has a great blog. You can check it out here.

Monday, August 2, 2010

ABC!

I just designed an alphabet poster for my daughter, so now I've got letters and typography on the brain. I love how a simple letter can look so beautiful, graphic and bold. As a designer, I have so much fun playing with different fonts, colors and negative space. With that in mind, here are some of my favorite 'typography/alphabet' themed finds on etsy:


White Wood Ampersand by Hindsvik


Paris Letters - 5x5 Original Photos by Little Brown Pen


Initial Letter G (from Antique Typewriter) by QA Create


Yellow Orange and Pink Alphabet Pillow by Pillow Factory


Wood Alphabet Blocks by August Grove

Friday, July 30, 2010

Stylish Storage

I have been a big fan of Sewing Momma on etsy for quite a while. Her shop's tagline is "Trying to make organizing pretty", and I think she has succeeded. These beautiful storage bins could be used to store just about anything. Here are a few of my favorites:


Large Comfy Storage Bin


Extra Deep Fabric Bin


Perched on a Branch Fabric Storage Bin

Thursday, July 29, 2010

Love this!


I found this free printable alphabet bunting at Ruffled via How About Orange. It's so cute (and free) that I just had to share. I think I might print these out, attach some felt to the back and let Luca use them on her felt board.

Tuesday, July 27, 2010

Displaying Children's Artwork

We do a lot of painting at our house, and sometimes it can be hard to figure out what to do with all of the resulting artwork. I'm sure this has been done before, but I decided to cut out pieces of some of my daughter's paintings and frame them in a mat that I had leftover from a previous project (more on that later). And voila, here is the result:


I think it turned out pretty cute!

Sunday, July 11, 2010

Birthday Bash

My daughter turned 2 about a month ago and I was so excited that I went into party planning mode months in advance. I really wanted to create a fun and relaxed atmosphere for my daughter and about 9 of her friends (plus their mommies). I also wanted the day to reflect her personality and the things that she loves.
My little girl is really into butterflies and her favorite colors are pink and yellow, so that made coming up with a theme pretty easy: pink and yellow butterflies!
I kept the decor simple. I made two butterfly garlands out of pink, yellow and white vellum paper. I got the idea here.


The one change I made was to hand sew, rather than use a sewing machine. This was primarily because I wanted to have a lot of control over the spacing between the butterflies.


The rest of the decor consisted of pink, yellow and white balloons, and some butterfly shaped confetti that I purchased from Paperika and sprinkled on the dining room table.


Every child received their own party cup to use (and take home with them). I designed some simple labels and stuck them on some straw cups that I found at Target.


Then I made some custom paper party hats (I used an old hat that we had as a template), and a special "2" crown for my daughter.
The menu consisted of my daughter's favorite foods: hot dogs, fruit, pretzels, veggies, guacamole and chips. It was the dessert that was probably the most labor-intensive part of the whole process. I made chocolate cupcakes with buttercream icing, and decorated them with pink and yellow fondant butterflies.


Then I made sugar cookies and decorated them with pink and yellow royal icing.


I got all of my recipes from the wilton website and read some excellent cookie decorating tutorials at prudent baby.
The treat boxes were small brown paper boxes that I sealed with round labels (bought at Michael's in the wedding section).


I stuffed them with teddy grahams and some fabulous recycled butterfly crayons that I bought at Gaddy Nipper Crayons.
It turned out to be a beautiful day, and my daughter had a blast, which made the late nights decorating cookies and sewing butterflies totally worth it!
Here's my little girl enjoying her cupcake:


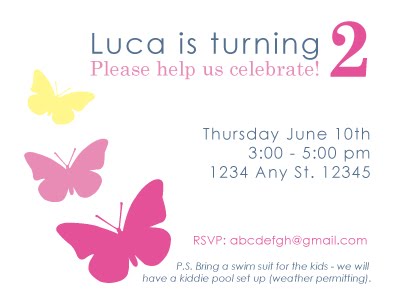
Oh, and this was the invitation that I designed: